
Installing a collet without proper inspection can lead to poor tool holding, excessive runout, inaccurate machining, and unexpected machine downtime. A simple inspection takes only a few minutes. However, it can save hours of production loss and expensive spindle repairs.
This Collet Inspection Checklist is designed for CNC operators, production engineers, maintenance teams, and machine shop owners. It explains every inspection point that should be completed before installing a collet. Following this Collet Inspection Checklist helps improve machining accuracy, increase tool life, and maintain consistent production quality.
If you regularly work with ER Collets, DIN Collets, 5C Collets, or Traub Collets, this guide will help you identify common issues before they affect machining performance.
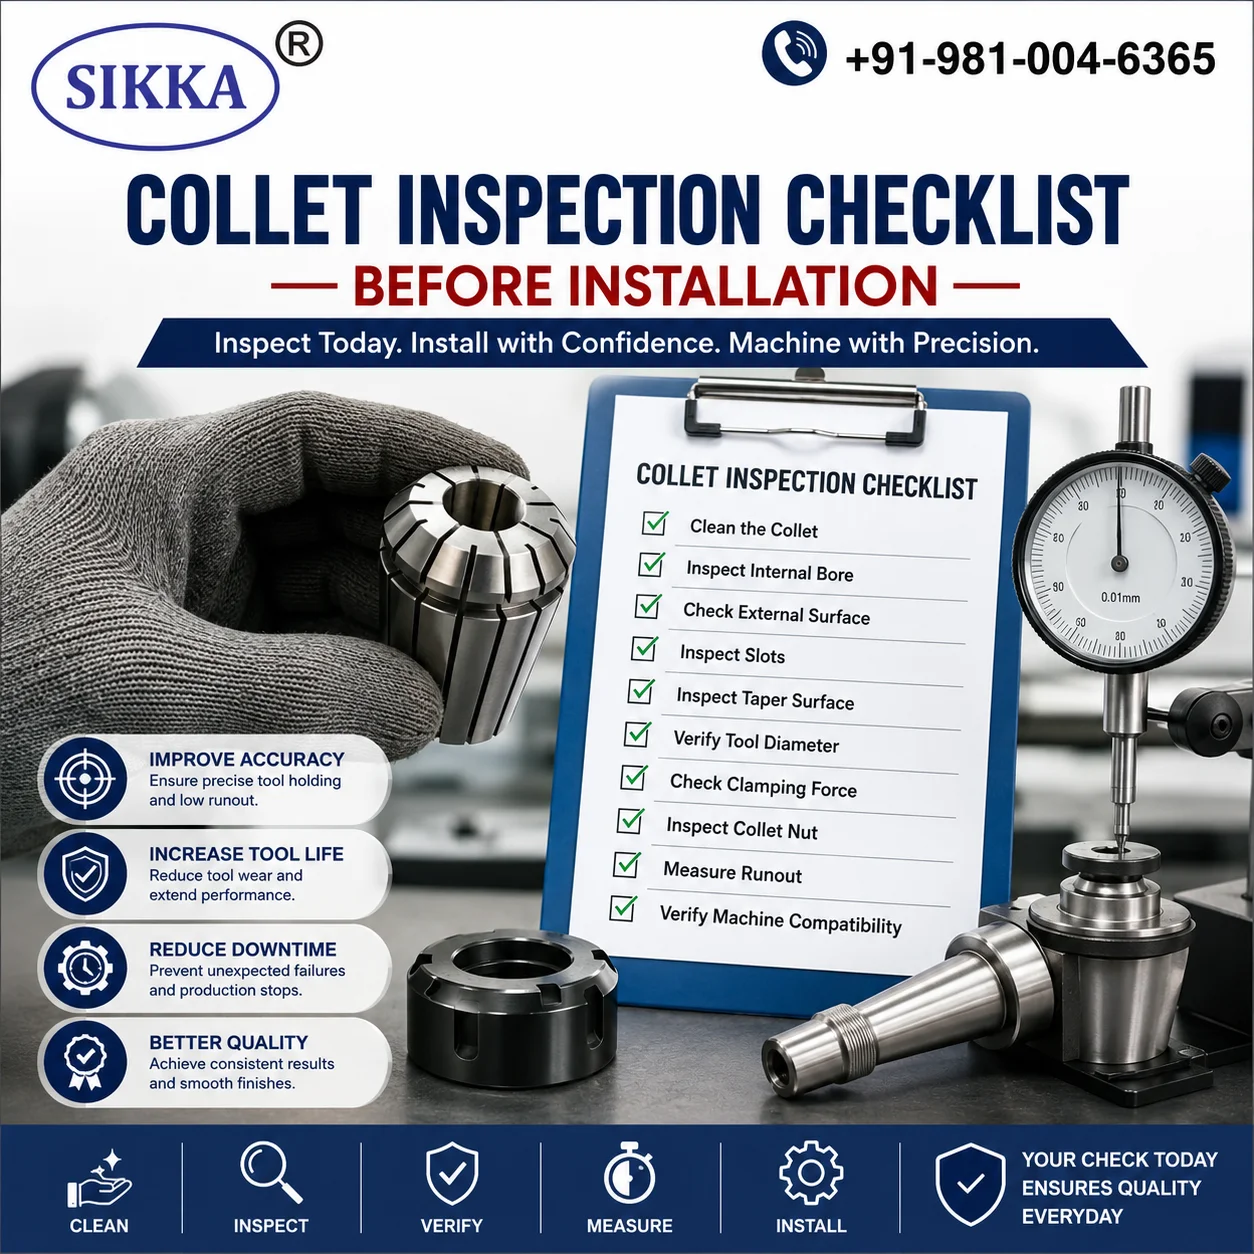
What is a Collet Inspection Checklist?
A Collet Inspection Checklist is a step-by-step process used to verify that a collet is clean, undamaged, and ready for installation. It ensures that the collet grips the cutting tool correctly and maintains proper concentricity during machining.
Many machining problems begin with a damaged or contaminated collet. Dirt, chips, worn slots, or incorrect sizing can reduce gripping force and increase tool runout. Inspecting every collet before installation helps eliminate these problems before production starts.
A complete Collet Inspection Checklist should include:
- Surface inspection
- Internal bore inspection
- Slot condition
- Taper inspection
- Runout verification
- Collet nut inspection
- Diameter verification
- Machine compatibility check
Why Should You Perform a Collet Inspection Before Installation?
Many workshops replace cutting tools frequently but continue using damaged collets. This often leads to poor machining results even when premium cutting tools are used.
A proper Collet Inspection Checklist helps identify problems before they become expensive failures.
Improve Machining Accuracy
A clean and undamaged collet holds the tool concentrically. This reduces runout and produces better dimensional accuracy.
Increase Tool Life
Incorrect gripping creates uneven cutting loads. This causes premature tool wear and frequent tool replacement.
Protect the Machine Spindle
Damaged collets transfer unnecessary vibration to the spindle. Long-term vibration can reduce spindle life.
Reduce Machine Downtime
Finding a damaged collet before installation is much easier than stopping production after machining defects appear.
Maintain Consistent Surface Finish
Stable tool holding improves cutting stability. It also produces smoother surface finishes on finished components.
Before selecting a new collet, it is also helpful to understand how to choose the right collet for your machining needs.
10-Step Collet Inspection Checklist Before Installation
Follow every step carefully before mounting a collet into the holder.
1. Clean the Collet Thoroughly
The first step in every Collet Inspection Checklist is cleaning.
Even tiny metal chips can prevent proper seating inside the taper.
Inspect for:
- Metal chips
- Dust
- Oil deposits
- Coolant residue
- Rust particles
Use compressed air followed by a clean lint-free cloth. Avoid using damaged cleaning brushes that may scratch the collet surface.
Never install a dirty collet. It directly affects gripping force.
2. Inspect the Internal Bore
The internal bore directly contacts the cutting tool.
Any damage inside the bore affects tool holding accuracy.
During this Collet Inspection Checklist, check for:
- Scratches
- Metal pickup
- Burrs
- Wear marks
- Corrosion
If the bore shows uneven wear, replace the collet instead of attempting repairs.
3. Examine the External Surface
The outer surface must fit perfectly inside the chuck taper.
Inspect the complete outer body under proper lighting.
Look for:
- Hairline cracks
- Dents
- Impact marks
- Corrosion
- Surface deformation
Even small cracks can grow under machining loads. Never reuse a cracked collet.
4. Check the Collet Slots Carefully
The slots allow the collet to compress evenly around the cutting tool.
Damaged slots reduce gripping performance.
Your Collet Inspection Checklist should verify:
- No bent slots
- No broken fingers
- No excessive widening
- Uniform slot spacing
- Smooth compression
If one slot is damaged, gripping force becomes uneven across the tool shank.
This often causes vibration and poor machining quality.
5. Inspect the Taper Contact Surface
The taper is responsible for proper seating inside the collet chuck.
Even minor contamination can create alignment errors.
Inspect for:
- Uneven polishing
- Scratches
- Burrs
- Rust
- Foreign particles
If the taper surface is damaged, the entire Collet Inspection Checklist becomes ineffective because the collet will not seat correctly.
To understand how quality tool holding improves machining performance, read our guide on the crucial role of collet chucks in CNC machining.
Why Experienced Manufacturers Recommend Inspection Before Every Installation?
At Sikka Sales Corporation, every precision collet is manufactured using high-quality steel and strict quality control processes. The company supplies precision collets for demanding industrial applications where machining accuracy and consistent gripping performance are critical.
Professional inspection before installation is recommended because even a premium collet can lose accuracy if it is contaminated, mishandled, or damaged during storage or transportation.
Sikka Sales Corporation
31/3F, Street No. 1,
Anand Parbat Industrial Area,
New Delhi – 110005, India
Phone: +91-981-004-6365
Google Business Listing:
View Location on Google Maps
The company manufactures precision collets using high-quality steel and follows professional manufacturing practices to deliver reliable performance across a wide range of machining applications.
Understanding the manufacturing quality behind a precision collet also helps users appreciate why regular inspection is essential before every installation.
6. Verify the Tool Holding Diameter
The next step in every Collet Inspection Checklist is verifying the tool shank diameter.
A mismatched collet cannot provide proper gripping force.
Always ensure:
- The tool shank matches the collet size.
- The tool is inserted to the recommended depth.
- The clamping range is not exceeded.
- The tool shank is clean and free from burrs.
Using a smaller or oversized tool can result in tool slippage, vibration, and poor dimensional accuracy.
For better sizing accuracy, read our guide on how to determine the best collet size for your CNC milling machine.
7. Check the Clamping Force
Proper clamping force is essential for safe machining.
This part of the Collet Inspection Checklist helps prevent tool movement during high-speed operations.
Inspect the following:
- Uniform clamping pressure
- No loose gripping
- No excessive tightening marks
- Smooth compression after tightening
Always tighten the collet using the recommended torque values. Over-tightening can permanently damage the collet.
8. Inspect the Collet Nut
The collet nut is often ignored during inspection.
However, a damaged nut can reduce machining accuracy even if the collet is in perfect condition.
Check for:
- Thread damage
- Worn bearing surface
- Metal chips inside the nut
- Cracks or deformation
Clean the nut thoroughly before reassembly.
If the threads are worn, replace the nut immediately.
9. Measure Tool Runout
Runout directly affects machining precision.
No Collet Inspection Checklist is complete without checking runout.
Use a dial indicator to measure tool runout after installation.
High runout may indicate:
- Damaged collet
- Dirty taper
- Worn spindle
- Improper installation
- Incorrect collet size
Even a small increase in runout can reduce tool life and surface finish quality.
10. Verify Machine Compatibility
Always confirm that the collet matches the machine and holder specifications.
Your final Collet Inspection Checklist should verify:
- Correct collet series
- Compatible collet chuck
- Correct spindle type
- Matching collet nut
- Recommended application
Never force an incompatible collet into the holder.
This can damage both the collet and the spindle.
Common Collet Inspection Mistakes to Avoid
Many machining problems occur because basic inspection steps are skipped.
- Installing a dirty collet.
- Ignoring hairline cracks.
- Using worn-out collets.
- Mixing different collet sizes.
- Over-tightening the collet nut.
- Skipping runout testing.
- Using damaged collet nuts.
- Ignoring taper contamination.
Following a proper Collet Inspection Checklist eliminates these common mistakes before machining begins.
Signs Your Collet Should Be Replaced
| Inspection Finding | Recommended Action |
|---|---|
| Hairline crack | Replace immediately |
| Heavy corrosion | Replace |
| Bent slots | Replace |
| Uneven gripping | Replace |
| Excessive runout | Replace |
| Thread damage | Replace collet nut if required |
| Deep scratches on taper | Replace |
Never continue machining with a damaged collet. The replacement cost is far lower than repairing a damaged spindle.
Tools Required for a Proper Collet Inspection Checklist
- Dial indicator
- Digital caliper
- Micrometer
- Compressed air
- Lint-free cleaning cloth
- Magnifying glass
- Torque wrench
- Inspection light
Recommended Inspection Frequency
| Inspection Activity | Recommended Frequency |
|---|---|
| Visual inspection | Before every installation |
| Cleaning | Daily |
| Runout measurement | Weekly |
| Complete Collet Inspection Checklist | Monthly or after heavy production |
Quick Collet Inspection Checklist
| Inspection Point | Status |
|---|---|
| Collet cleaned | ☐ |
| Internal bore inspected | ☐ |
| External surface checked | ☐ |
| Slots inspected | ☐ |
| Taper surface checked | ☐ |
| Tool diameter verified | ☐ |
| Clamping force checked | ☐ |
| Collet nut inspected | ☐ |
| Runout measured | ☐ |
| Machine compatibility verified | ☐ |
Frequently Asked Questions
How often should a collet be inspected?
A visual inspection should be performed before every installation. A complete Collet Inspection Checklist should be completed monthly or after heavy machining operations.
Can a cracked collet be reused?
No. Even a small crack can expand under machining loads and cause tool failure.
What causes excessive runout?
Dirty tapers, damaged collets, incorrect installation, worn collet nuts, and spindle wear are common causes.
Should a collet be lubricated before installation?
Only follow the lubrication recommendations provided by the machine or collet manufacturer. Excess lubricant can attract chips and dirt.
Can a worn collet damage the spindle?
Yes. Poor gripping and excessive vibration can gradually reduce spindle life and machining accuracy.
Conclusion
A proper Collet Inspection Checklist is one of the easiest ways to improve machining accuracy, reduce tool wear, and prevent unexpected machine downtime. Every inspection point—from cleaning and bore inspection to runout testing and compatibility verification—plays an important role in maintaining reliable machining performance.
Ignoring a damaged collet can lead to expensive repairs, rejected components, and production delays. Spending a few minutes on inspection before every installation helps maintain consistent quality and extends the life of both cutting tools and machine spindles.
If you are looking for precision-engineered collets manufactured to high-quality standards, Sikka Sales Corporation offers a wide range of industrial collets produced from premium-quality steel for demanding machining applications. Explore our ER Collets, 5C Collets, and Traub Collets to find the right solution for your machining requirements.